LEARNING CENTER
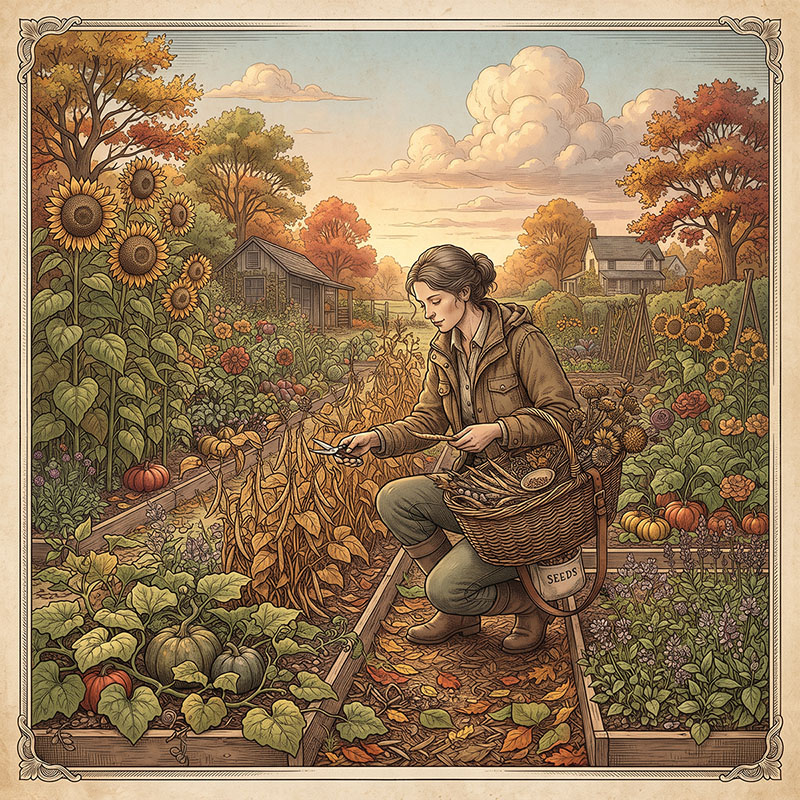
Seed Keepers
Learn how to save, dry, store, and share seeds for next year's garden.
Seed Keepers: Saving Seeds for Next Year's Garden
There is something satisfying about gathering seeds from a plant you have grown yourself. A dry flower head, a ripe tomato, or a handful of bean pods can hold the beginning of next year's garden. Instead of buying every seed you plant, you can save some of your own, label them, and tuck them away until planting time returns.
People have been saving seeds for thousands of years. Long before garden centers and seed catalogs existed, families and communities collected seeds from plants that provided food, fiber, medicine, and beauty. They kept what they needed for the next growing season and often shared seeds with neighbors. Over generations, gardeners selected plants with desirable qualities, helping preserve varieties suited to their local conditions and tastes.
You don't need a large garden, special equipment, or years of experience to become a seed keeper. You can begin with a single packet of beans, a few flower heads, or one especially delicious tomato. The trick is knowing which seeds to save, when to collect them, and how to store them so they have a good chance of growing next year.
Start with the Right Plants
Some plants are much easier for beginners to save seeds from than others. Beans, peas, lettuce, and many common flowers are good places to start. Their seeds are relatively easy to collect, dry, and store.
Beans and peas are especially convenient. Simply leave a few healthy pods on the plant instead of harvesting them for dinner. Allow the pods to mature and dry on the plant as much as conditions permit. When the pods are brown and crisp, collect them and remove the seeds.
Lettuce produces small flowers and then forms seeds attached to fluffy tufts. Allow some plants to flower and mature rather than harvesting all their leaves. Collect the seed heads when the seeds are mature and dry, before wind scatters them.
Many flowers, including marigolds, zinnias, and sunflowers, also produce seeds that are fairly easy to recognize and collect. Wait until the flower heads have faded and the seeds have matured. Sunflower seeds, for example, are ready when the back of the flower head turns yellow or brown and the seeds are plump.
Choose healthy plants that have grown well in your garden. If a plant was unusually weak, diseased, or disappointing, it probably isn't the best candidate for producing next year's crop. Saving seeds from your strongest plants gives you a better starting point.
One important caution: some garden plants sold as hybrids may not produce offspring that resemble the original plant. We'll look at that in a moment.
Know When Seeds Are Ready
A common mistake is collecting seeds too early. Seeds need time to mature before they can grow into healthy new plants.
For many plants, maturity is signaled by a change in color or texture. Green bean pods turn brown and dry. Flower heads become crisp and papery. Seeds inside mature fruits become fully developed.
For plants whose seeds are inside edible fruits, the timing depends on the crop. A tomato intended for seed saving should be fully ripe, not picked while green. A cucumber or squash grown for seed may need to remain on the plant well beyond the stage when you would normally harvest it for eating.
Weather can complicate matters. Wet autumn conditions may cause seed heads and pods to mold before they dry. If rain is persistent, you may need to collect nearly mature material and finish drying it indoors in a well-ventilated place. Avoid sealing damp seeds in a container.
When collecting seeds, keep different plants or varieties separate. A small envelope, paper bag, or shallow tray can help you keep track of each collection while it dries.
A Little Surprise: Seeds Don't Always Grow True to Type
Have you ever planted a seed from a particularly good vegetable and wondered whether next year's plant would be just like it? The answer depends partly on how that plant was pollinated and how its variety was developed.
Flowers produce seeds after pollen reaches the flower's female reproductive parts. Pollen may come from the same flower, another flower on the same plant, or a different plant of the same or a related species. Insects, wind, and other natural processes can carry pollen between plants.
When compatible varieties cross-pollinate, their offspring may inherit a mixture of traits from both parents. A squash grown from a saved seed might produce fruit with a different shape, color, or flavor than the squash you enjoyed this year. The same principle applies to many other crops.
This is particularly important with squash and pumpkins, which can cross-pollinate with compatible varieties of the same species. Some other crops, including corn, are also readily cross-pollinated. Tomatoes generally self-pollinate, so crossing is less common in many garden settings, although it can happen.
Hybrid varieties present a separate consideration. Commercial F1 hybrids are produced by crossing selected parent lines. Their saved seeds may grow perfectly well, but the resulting plants often vary in appearance, flavor, size, or other characteristics rather than reproducing the original hybrid consistently.
For more predictable results, beginners can start with open-pollinated varieties. These are varieties that can generally reproduce their characteristic traits when properly maintained and isolated from unwanted cross-pollination. Heirloom varieties are usually open-pollinated, although the two terms are not exactly interchangeable.
Does this mean you should never save seeds from a hybrid or a plant that might have cross-pollinated? Not at all. You can experiment and see what grows. Just understand that the results may be different from what you expected. Sometimes a surprise is part of the fun.
Dry Seeds Thoroughly
Drying is one of the most important steps in seed saving. Seeds stored while damp can develop mold or deteriorate before planting time.
Spread freshly collected seeds in a single layer on a paper plate, sheet of paper, or shallow tray. Label the tray immediately so you don't mix up varieties. Place it somewhere dry, out of direct sunlight, with good air circulation.
Stir or turn the seeds occasionally if needed. Larger seeds, such as beans, may take several days or longer to dry thoroughly, depending on humidity and the conditions in your home. Small seeds may dry more quickly.
Avoid using high heat to speed the process. A hot oven, radiator, or other intense heat source can damage seeds. Gentle air drying is safer.
There is one important exception to the usual dry-seed method: seeds from some wet fruits, especially tomatoes, are commonly separated from the pulp and fermented briefly before rinsing and drying. This can help remove the gelatinous coating around the seeds. If you're just starting out, dry-seeded crops and flowers are simpler projects.
Label, Package, and Store
Once seeds are thoroughly dry, package them in paper envelopes or seed packets. Your packet doesn't need to be fancy, but it should protect the seeds from being scattered or mixed with other varieties.
Label every packet with the plant name and the date you collected the seeds. If you know the variety, include that information too. You might also note where the plant grew or any special quality that made you choose it.
For example:
-
Plant: Green bean
-
Variety: Blue Lake
-
Collected: October 2026
-
Notes: Strong plants; good harvest
Your notes can be as simple or detailed as you like. If you save seeds every year, these records will help you remember which plants performed well.
Keep seed packets in a cool, dry, dark place. A tightly closed container can help protect them from humidity and pests, but only put thoroughly dry seeds inside. Avoid storing packets in a warm shed, a damp basement, or a location exposed to large temperature swings.
Some gardeners use a refrigerator for longer-term storage, provided seeds are sealed against moisture and allowed to return to room temperature before the container is opened. A refrigerator isn't necessary for every home seed collection, however. A consistently cool, dry cupboard may be perfectly adequate for seeds you plan to use the following season.
Seeds do not all remain viable for the same length of time. Some last several years under good conditions; others lose their ability to germinate more quickly. If you're uncertain about an older batch, test a few seeds before relying on them for your whole garden.
Test Before Planting
A simple germination test can help you decide whether saved seeds are still worth planting.
Dampen a paper towel, place a small sample of seeds on it, and fold the towel over them. Put the towel in a loosely closed plastic bag or another container that retains moisture without leaving the seeds sitting in water. Keep it somewhere suitable for the crop's germination needs, and check it regularly.
After the usual germination period for that plant, count how many seeds have sprouted. If eight out of ten germinate, your sample has an 80 percent germination rate. You may want to sow a few extra seeds to allow for those that don't sprout.
This little test is particularly useful for older seeds. It can save you from waiting weeks for a garden that never comes up as expected.
Share the Seeds—and the Story
Seed saving can be more than a way to reduce garden expenses. It can connect you with other gardeners and help preserve plants that have done well in a particular place.
Perhaps your neighbor grows a beautiful flower that returns reliably every year. Perhaps a relative has a bean variety that has been grown in the family for generations. Exchanging seeds, along with the stories behind them, keeps useful knowledge moving from one gardener to another.
If you share seeds, label them honestly and explain anything you know about their origin. Mention if they came from a hybrid plant or if cross-pollination may have occurred. A little information helps the next gardener decide how to use them.
Remember that some plants are protected varieties, and saving or sharing their seeds may be restricted by applicable plant variety rights or other rules. When in doubt, check before distributing them.
Your Seed-Keeping Season Starts Here
You don't have to save every seed in your garden. Choose one or two plants, learn their needs, and begin there. Next year, you can try something different or build on what worked.
As the growing season winds down, look for a few healthy plants worth remembering. Let their seeds mature, collect them carefully, dry them well, and label them before putting them away.
Then make a packet for your collection. Our printable seed packet gives you a simple place to store and identify what you've saved. Add the plant name, variety, and collection date, and you'll have a small piece of this year's garden ready to help begin the next one.
A garden may look finished when the last flowers fade and the final vegetables are picked. But for a seed keeper, the next growing season is already beginning.
Keep a few seeds. Keep a few notes. And see what grows next year.
Keep Exploring
Categories: